29.3.11

Playing around with some new fabrics


My daughter insisted I buy the castle fabric for her while we were at the Pajaro Valley Quilt Show last month.  The line is called "castle peeps".  I just bought the two prints showed here and will fill in the rest of the quilt with stash fabric.  I thought the blue print coordinated well - it has an orange peel print w/ a hornet or bee at the center.  I want to add a crenelated border to echo the castle print.  I still need to decide on fabrics and "do the math".  This may be in process for a while!

I'm on spring break this week and what better use of my time than to go fabric shopping?  My absolute favorite fabric store in the City - Peapod Fabrics - just reopened in a new and bigger location last Friday and I made it to the store on Sunday.


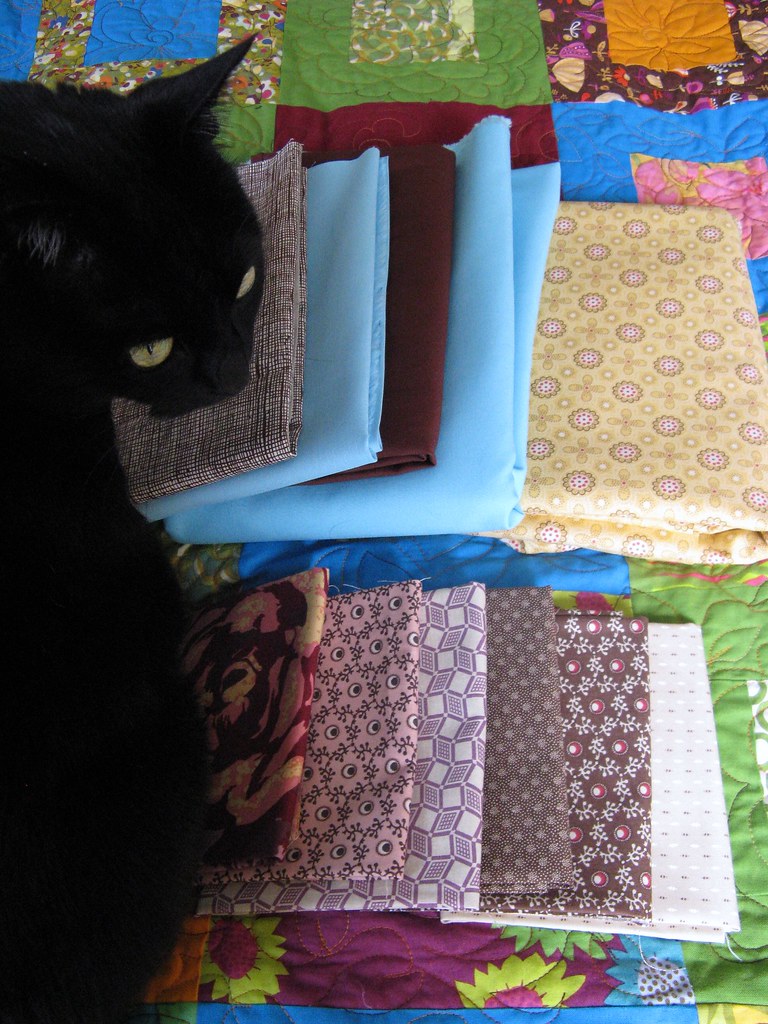
It was wonderful to visit with the shops' owner and see all of the fabulous fabrics on display.  The store is still very small by most standards but probably double the size of the former location.  I found fabric backings for two quilts in my WIP pile - the Ohio Star quilt from the Shrinking Quilters' Bee (the yellow print) and an aqua solid for my triangle quilt and the solid brown for the binding.   

The small cuts are not fat quarters but are small cuts (I haven't measured them but they are maybe 1/3 smaller than a fat quarter.  This is my only quibble with the store - she doesn't carry fat quarters.  I'm really loving the purples, browns and beige colors in these scraps.  I'm imagining these prints in small scale paper pieced blocks.  We'll see.

26.3.11

It's a pillow... at last!


Seriously,  I had a major phobia about putting a zipper into a pillow form.  The fabric, embroidery (from a class I took at a quilt show) and various zippers have been hanging out on my work table for about a month.  It's far from perfect -- I was a little confused about where to start stitching around the zipper and there is a gap at both ends.  I used the tutorial by Sewkatiedid (http://sewkatiedid.wordpress.com/2010/04/24/zip-to-your-pillow/) and "winged" the parts that weren't clear to me.


It feels good to have another long lingering WIP completed.

22.3.11

A Finish!

It seems like ages since I've had a completed quilt but I'm SO pleased with the way it came out.  We've been sleeping under it for a about a week without the binding, so it was time to make one last push and get it done.

I finished sewing the binding on Sunday afternoon - on my 50th birthday no less!  I've been calling this quilt "Color Block" which admittedly is pretty boring.  Maybe I should change it to "That 70's Quilt"?  What do you think?


The idea to rename the quilt popped in my brain when I came across the picture above when I was downloading my quilt pics onto Flickr from my computer. It's something my 10 year old daughter created one day when she was bored.

Some details:
Queen-sized
Assorted Kona cotton solids
Assorted prints:  Anna Maria Horner, Amy Butler, Joel Dewberry, Jane Sassaman, etc.
Backing is a Valori Wells print
Machine pieced and quilted by me
Machine quilting with Coats & Clarks variegated thread ("autumn")
Free-form flowers stitched in the squares, feather in border


I apologize for the crappy pictures.  First of all, I lost my camera and have had to use a very old Powershot.  And this is a BIG quilt -- too large to be photographed in it's entirety in my house.  Once it stops raining and things dry out a bit, I'll attempt a photo shoot outdoors.

8.3.11

Quilting progress - feathers


I needed a chunk of time to devote to quilting the the feather onto the quilt border and I found that chunk of time on Sunday afternoon.  There was the question of "who" was going to help my daughter with her science fair project and I managed to get my hubby to do so ...

I used a white fabric pencil and free-handed the feather design onto the fabric.  I prefer to quilt my feathers without marking the fabric, but in this case, I wanted to ensure a consistent "snaking meander" going all around the border, so marking it worked well.  I used Coats & Clark variegated thread - the same thread I used for the the rest of the quilt. 

I still need to go through and fix a few mistakes and then this baby is ready for binding.

In other (slightly tragic) quilting news, I am now "scrap less"


I asked my 16 year old son to empty the trash and he assumed my scrap bin was trash! Oy!!!

2.3.11

Quilting

Over the last couple of weeks, I've been freemotion quilting my Color Block quilt top.  On Saturday, I was literally on my last block when I ran out of thread.  Hopefully I will not have any trouble finding another spool of matching thread (Coats & Clark variegated from Joann's) and I'll be back in business again.


Here's a view of my progress from the back side.  I'm stitching a flower at the center of each block and adding leaves and squiggles to fill around the flowers and connect the blocks.  It has gone quicker and easier than I anticipated I think in part due to the design allowing me to work systematically from block to block and not requiring the quilt to be constantly turned.  One of the suggested quilting patterns for this design is to quilt conscentric squares starting at the center of each block.  While it would've looked very cool, I doubt I'd have the patience to execute such a design.  This is a queen sized quilt!


In some cases like in the photo above, I let the prints guide my flower designs.  I've been letting loose and having fun.